Waypoints Screen
The Waypoints screen specifies the locations a task handler needs to visit, including the starting point and the end destination, to complete the task. Additional waypoints can be added to guide the task handler to the correct location. E.g., you may want to set a waypoint to deliver linen to all wards on the 1st floor.
The default maximum number of waypoints is set to 20, although this is a system configuration and can be amended at system level.
Default Waypoints
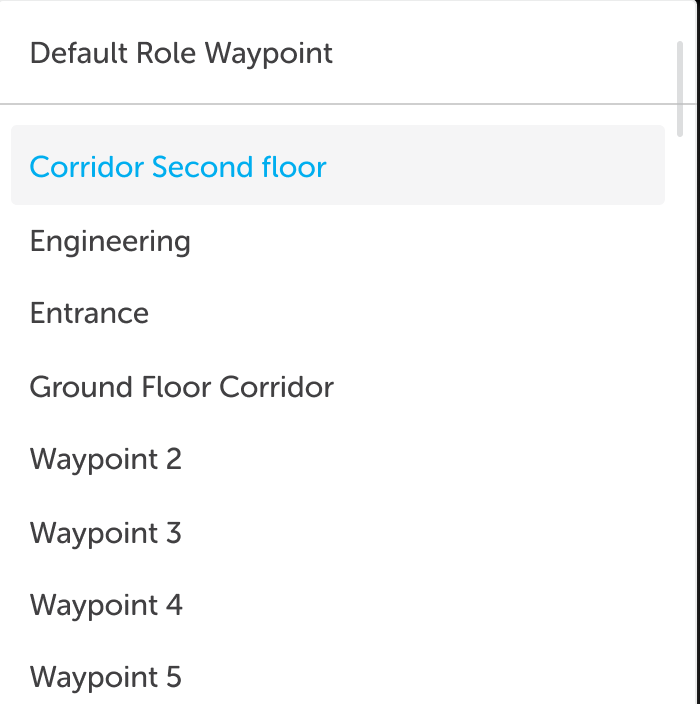
When adding a task, waypoints are automatically populated according to default waypoint settings. Although a waypoint has been automatically populated, it is possible to override the default and select a different waypoint. When the drop-down is selected, the default waypoint is displayed at the top of the list, separated by a horizontal line.
When a waypoint has multiple defaults set by a user with multiple roles and user role defaults, the waypoint will display blank. When the drop-down is selected, the default waypoints are displayed at the top of the list for easy selection.
Waypoint Workflows
If a Waypoint Workflow was selected on the Task Details screen, when the first waypoint is selected, the last waypoint is automatically populated with the same waypoint.
The final waypoint can be amended by the portal user if required.
Note: If the first or final waypoint is subsequently amended, the opposite waypoint is not affected.
Note: If the task type has a default waypoint set, this will automatically be populated in the first waypoint and therefore in the final waypoint.
Waypoint Mapping
Waypoint Mappings can be configured by IWS.
From a Portal User's point of view, this will mean that when the Waypoints screen displays during the Add Task process, one or more waypoints may be automatically populated based on the task type, their role/location and previously selected or added task details. This makes adding tasks more efficient as the pre-population of waypoints for certain assets means the person adding the task does not need to know where equipment is stored.
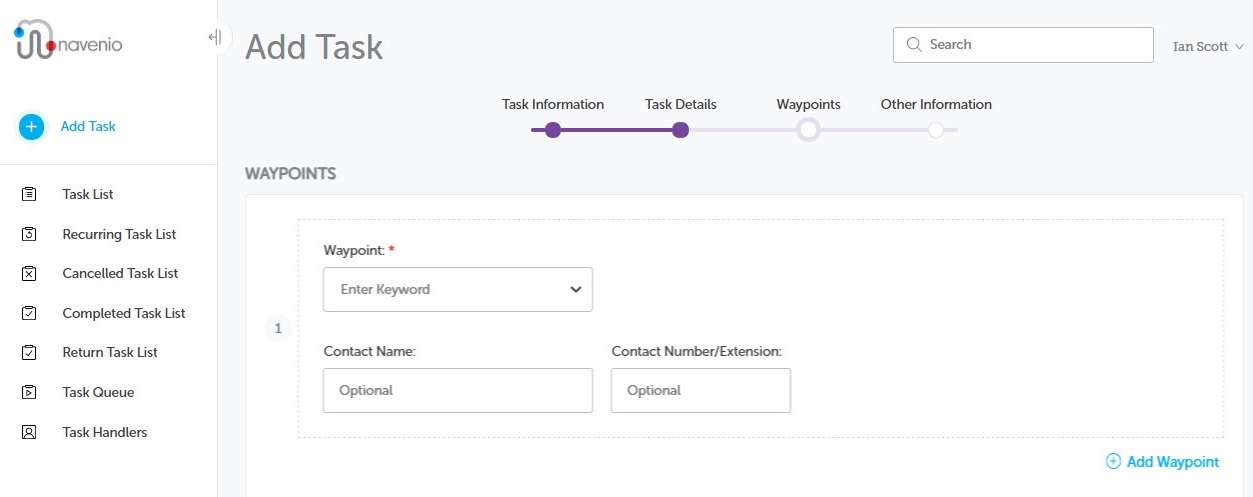
Enter Waypoints
- Enter the Waypoint you require by selecting an option from the drop-down menu. You can type a keyword into the field to filter the list and select from a shorter selection.
- (Optional) Enter the Contact Name and Contact Number for a staff member who can assist, if necessary, at that waypoint.
- Enter the details for the next or end waypoint as above.
- If you require more waypoints, click the Add Waypoint button.
- If you need to delete an extra waypoint you created, hover over the waypoint you want to remove then click the resulting delete button. You will be asked to confirm the deletion before it is removed from the task.
You cannot delete the minimum number of waypoint(s) required for the task. - Click Next or use the navigation bar to proceed to the Other Information screen.
Where there one or more pre-populated fields, use the drop-down to select a different waypoint, if necessary.
Note: You can re-arrange the waypoints order by dragging-and-dropping anywhere on the waypoint box.